This is the next article in the game creation series. You can follow the first introduction one if you haven’t read it yet.
Play-to-Earn (P2E) gaming is taking the web3 and blockchain world by storm, redefining how players interact with games. At the forefront? The WAX blockchain. It’s not just about virtual assets; it’s a hub for profitable farming and trading unique NFTs. WAX is where gaming meets earning, blending fun with financial potential.
Step 1: Crafting Your NFT Collection on WAX
Kicking off your NFT collection? Start with a bang by picking a killer theme. Space opera, historical epic, or a fantasy world – the sky’s the limit. Your choice should resonate with your audience. It’s all about creating an NFT universe that captivates and connects.
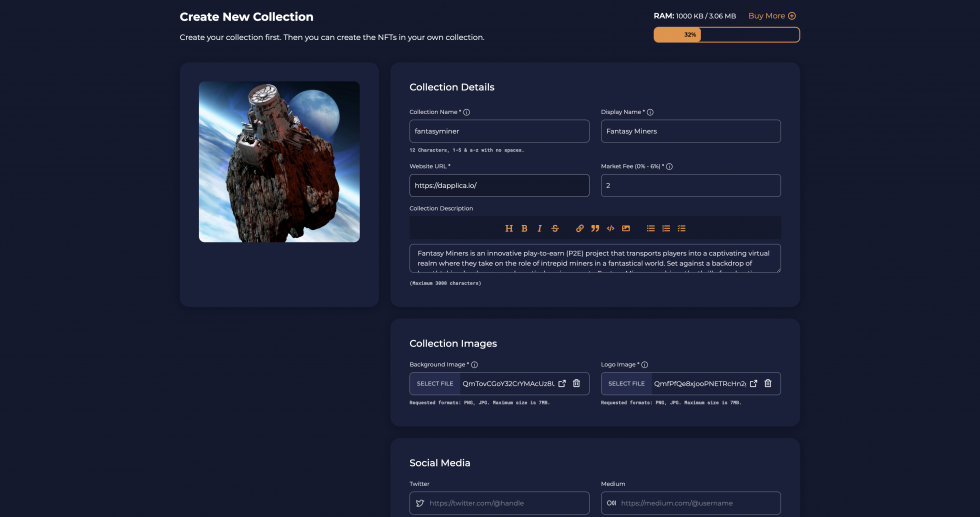 Collection creation screen on Atomic Hub
Collection Name
- Time to brand your NFT collection! Pick a name that’s unique and captures your project’s spirit. Keep it within 12 characters, mixing numbers (1-5) and letters. No spaces allowed. Example:
galacticgame.
- Time to brand your NFT collection! Pick a name that’s unique and captures your project’s spirit. Keep it within 12 characters, mixing numbers (1-5) and letters. No spaces allowed. Example:
Display Name
- This is what players see. Choose something catchy that embodies your game’s vibe. Example:
Galactic Game.
- This is what players see. Choose something catchy that embodies your game’s vibe. Example:
Website URL
- Add your website link where players and investors can dive deeper into your world. For instance: https://wax.io.
Market Fee
- Decide on the trading commission for your game’s platform. Let’s say, 2% for trading your NFTs.
Collection Description
- Get creative with your collection’s description. In 3000 characters or less, make it pop with your project’s main themes and ideas.
Collection Images
- Background Image: Set the scene with a background image that mirrors your game’s mood and theme.
- Logo Image: Pick an iconic logo to represent your collection, making it instantly recognizable.
Social Media
- Connect with your community. Add all your social links – Twitter, Medium, Facebook, GitHub, Discord, YouTube, Telegram.
These steps are your blueprint for crafting a standout NFT collection on WAX. Remember, every detail, from the name to socials, shapes your game’s appeal.
Step 2: Creating NFT Items on the WAX Testnet
2.1 Creating a Category (Scheme) for NFT

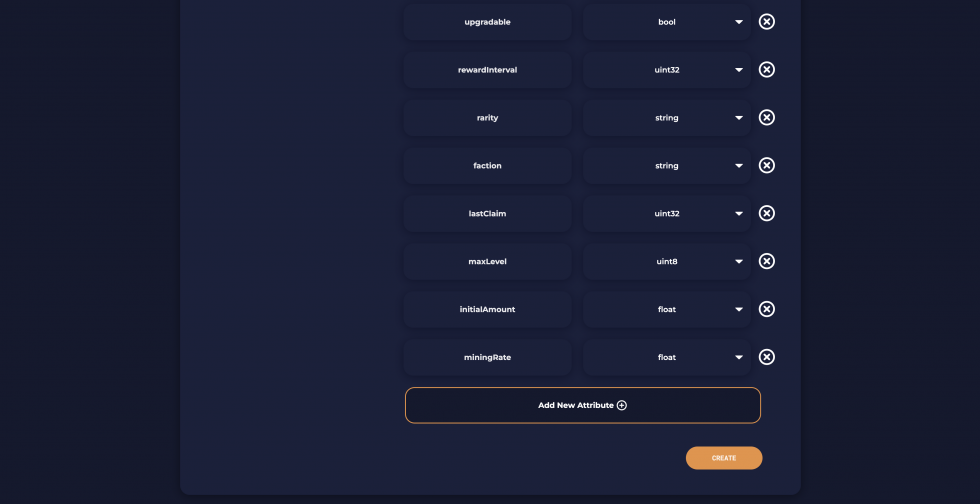 Schema creation screen in Atomic Hub
We will have the following fields:
name:
- Attribute type: string
- Description: Represents the name of the player or object being determined.
img:
- Attribute type: image
- Description: Corresponds to a visual representation or image associated with a player or object.
video:
- Attribute type: string
- Description: Indicates any video content associated with a player or object that provides additional multimedia elements.
slots:
- Attribute type: uint8
- Description: Shows the current number of available slots for resources, items, or other elements in the game.
maxSlots:
- Attribute type: uint8
- Description: Indicates the maximum number of slots that can be obtained or improved in the game.
level:
- Attribute type: uint8
- Description: Indicates the level or rank of a player or object, indicating progress in the game.
upgradable:
- Attribute type: bool
- Description: A boolean value indicating whether a player or object can be improved or leveled up.
rarity:
- Attribute type: string
- Description: Describes the rarity level of a player or item, noting its uniqueness or rarity.
faction:
- Attribute type: string
- Description: Represents the faction or group affiliation of a player or object in the game.
miningBoost:
- Attribute type: float
- Description: Indicates any boost or bonus associated with loot related to a player or object.
staking:
- Attribute type: int32[]
- Description: Calls the staking engine, providing information about the staking capabilities of a player or object.
stakeableResources:
- Attribute type: string[]
- Description: Lists the types of resources that can be staked by a player or an object in the game.
2.2 Creating Templates for NFT
First, we need to choose a category (scheme):
 Select schema for Template
Then we need to enter all the data for our Template:
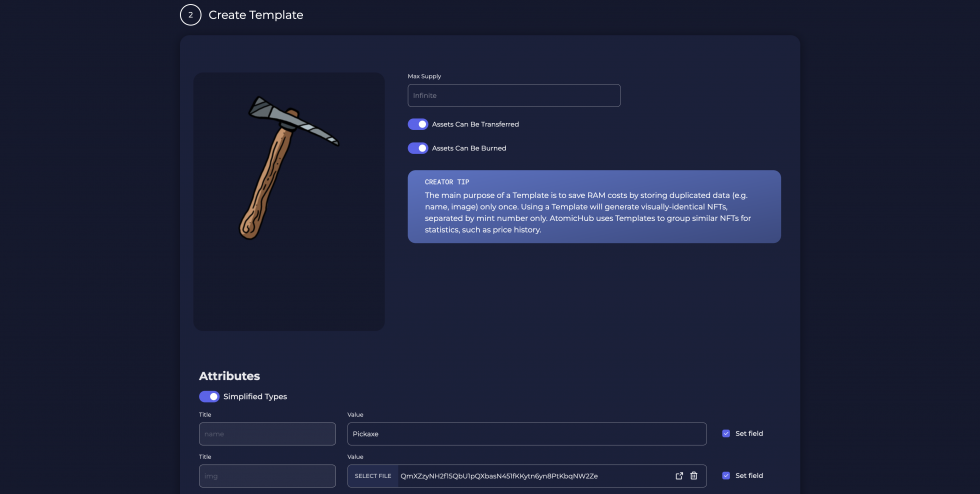 Creating NFT Template via Atomic Hub
After successful creation, we can see the result, as shown below:
 Templates Created for Collection in Atomic Hub
2.3 Minting NFT
We need to choose a category (scheme) and a template:
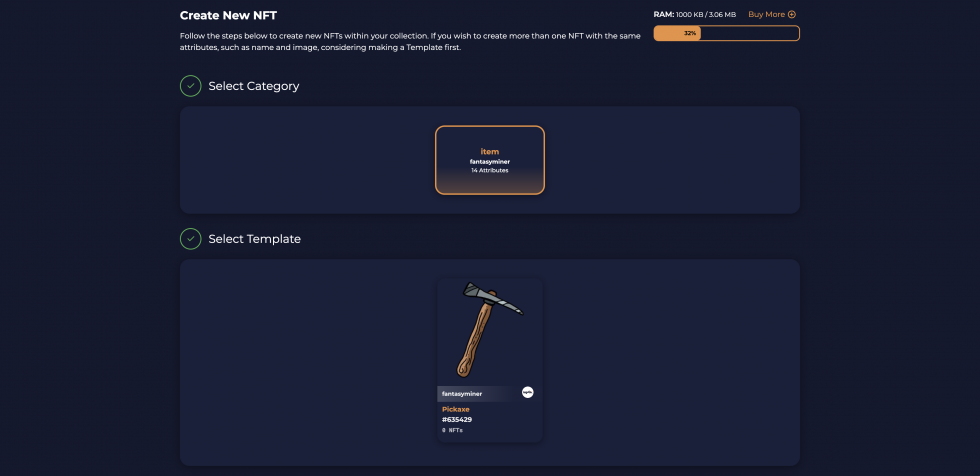 Minting new NFT at Atomic Hub
Then we enter whom to mint the NFT to in the Asset Receiver field and fill in the fields for the NFT, if necessary:
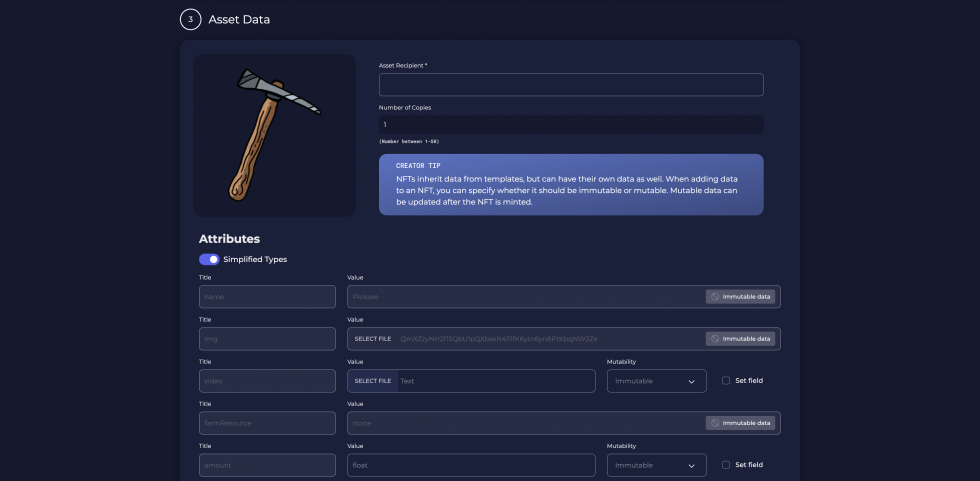
This is a brief process of creating one of our main asset types in this series of articles. Now, let’s proceed with another type of asset.