Claim My Cloud Wallet Account
This guide covers how to move from the legacy My Cloud Wallet to another wallet such as Anchor. This is not migration to the new My Cloud Wallet.
Basic Permissions
The two core permissions on a WAX account are Owner and Active.
- Owner: Authorizes account ownership operations, such as changing keys for any other permissions or creating new permissions. Owner keys should not be used for everyday third-party app access.
- Active: Handles normal day-to-day blockchain operations.
Additional custom permissions can also exist on an account, each with its own key pair and restricted scope.
Prepare Anchor Before You Claim
If you plan to use Anchor after a Soft Claim or Hard Claim, generating the keys in Anchor is the primary workflow. This lets you save the keys in the wallet first, use those public keys during the claim, and then import the account after the keys are assigned on-chain.
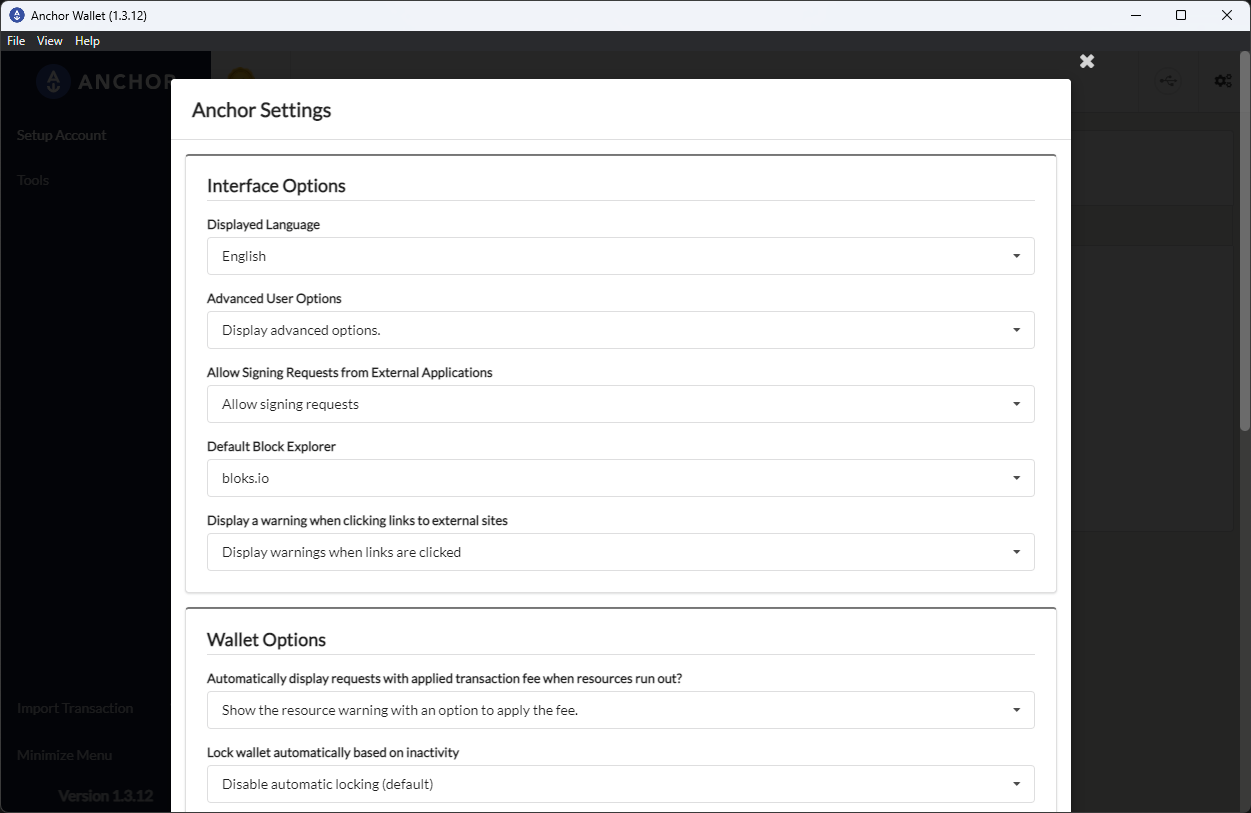
- Open Anchor Settings from the top-right gear icon and enable Display advanced options.

- Open Tools in Anchor.
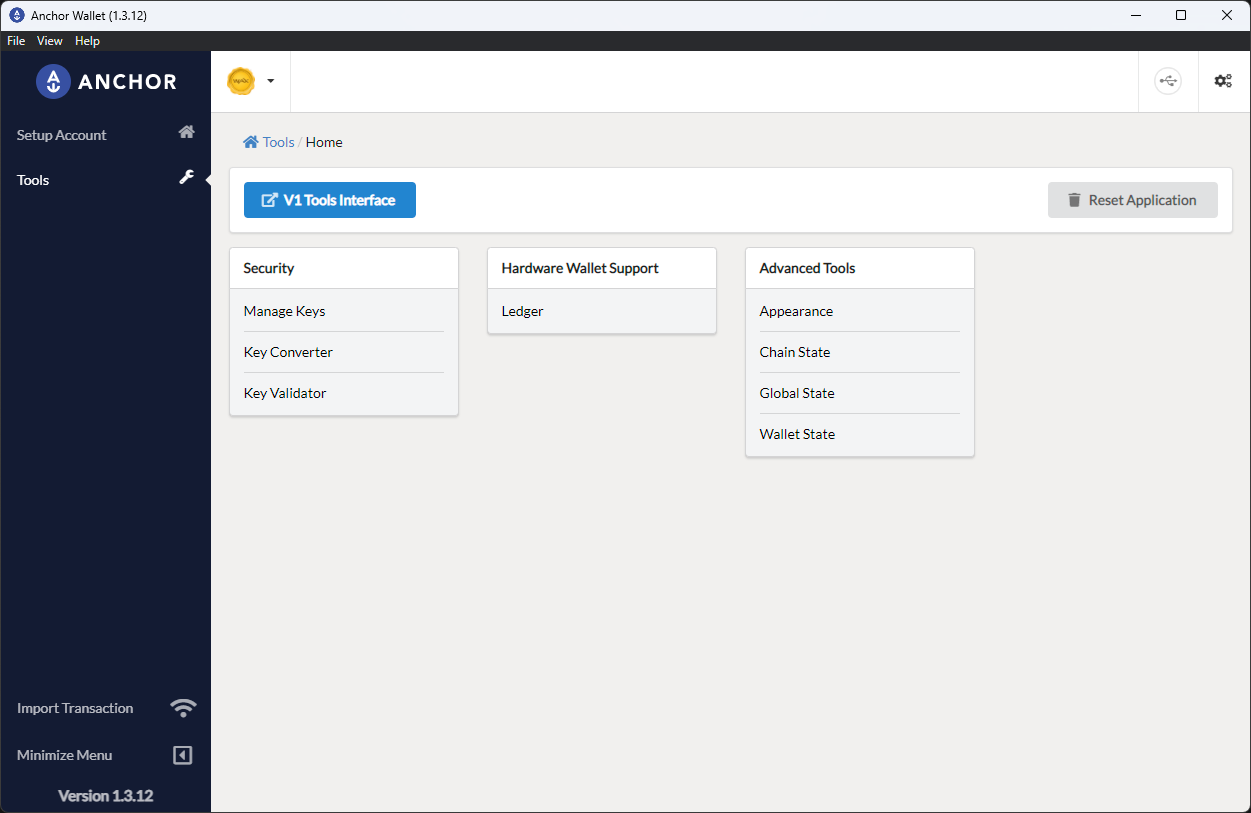
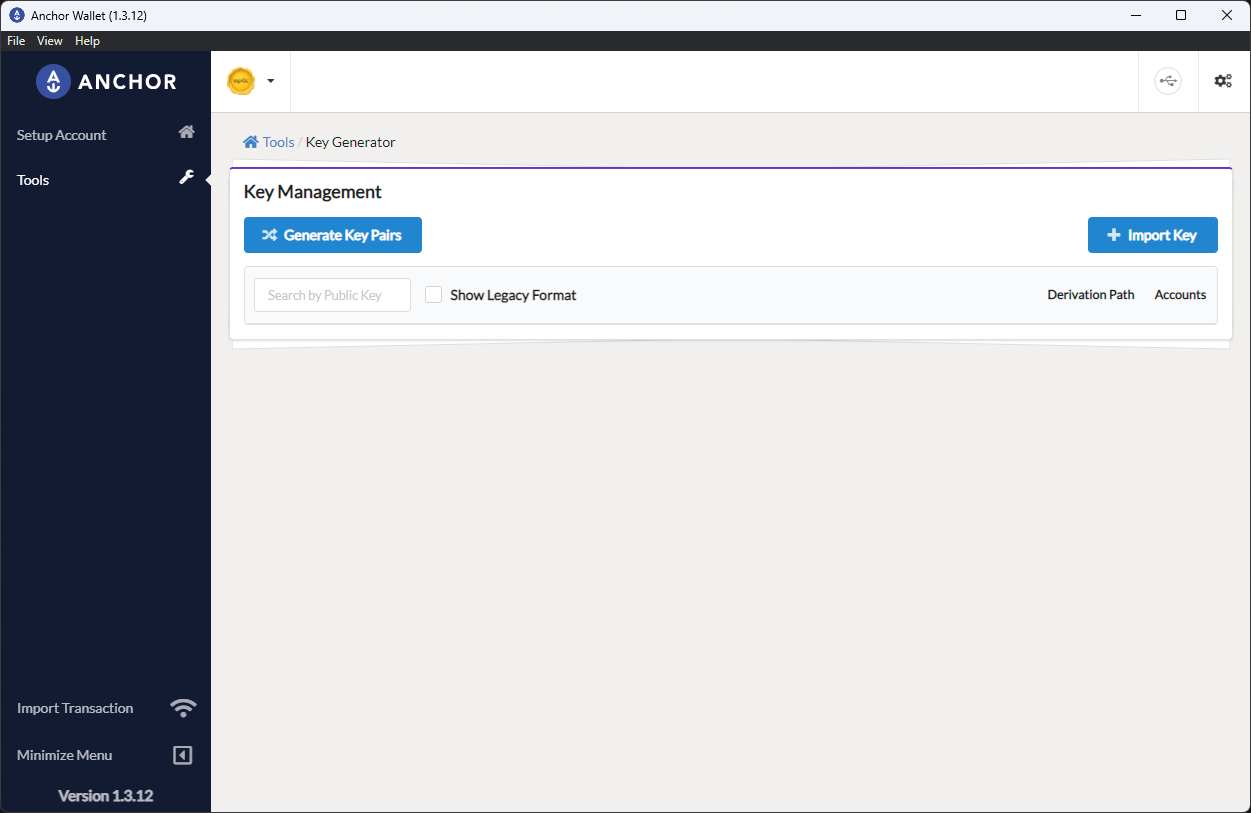
- Open Manage Keys. You can either import an existing key or generate fresh keys in Anchor. For a new Soft Claim or Hard Claim, generating new keys is the usual path.
- Select Generate Key Pair (x2) to create two key pairs, one for Owner and one for Active.
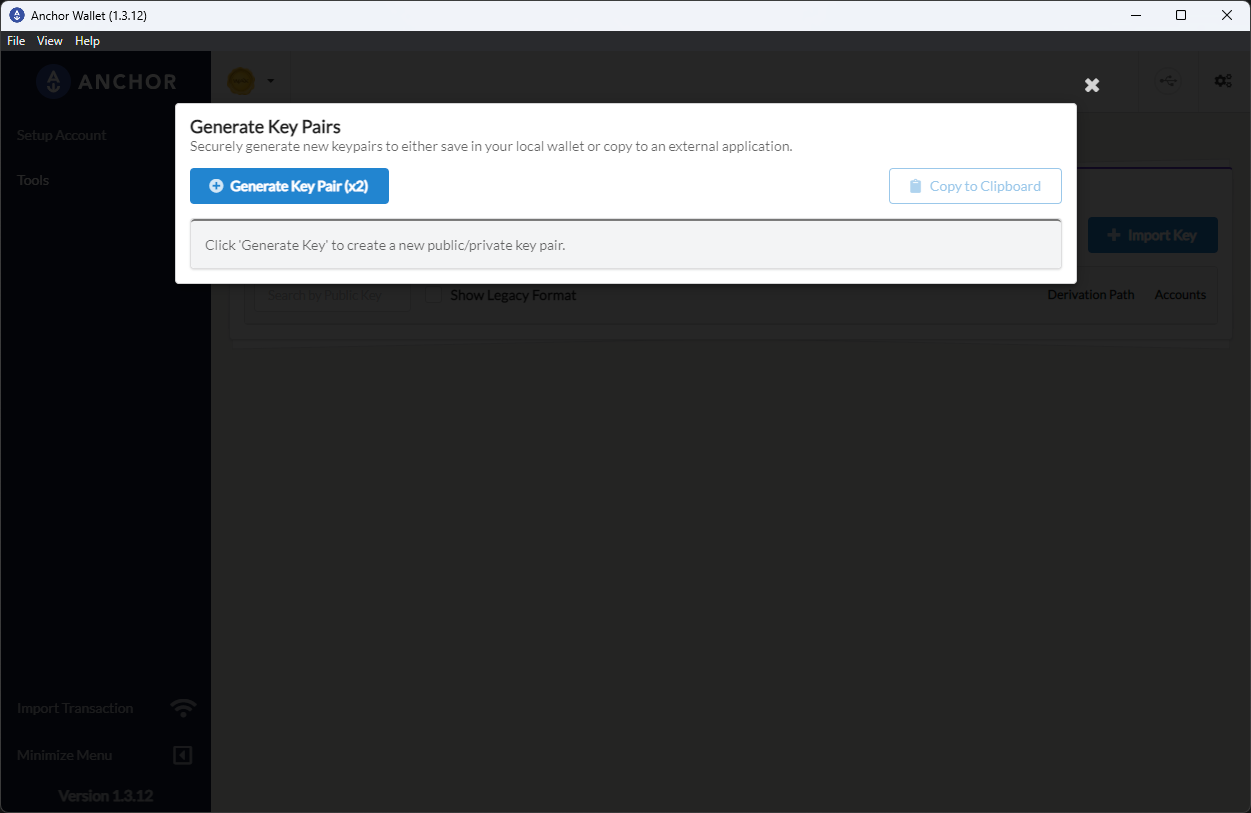
- After the keys appear, save them to the wallet.

- Enter your Anchor password to authorize the save.
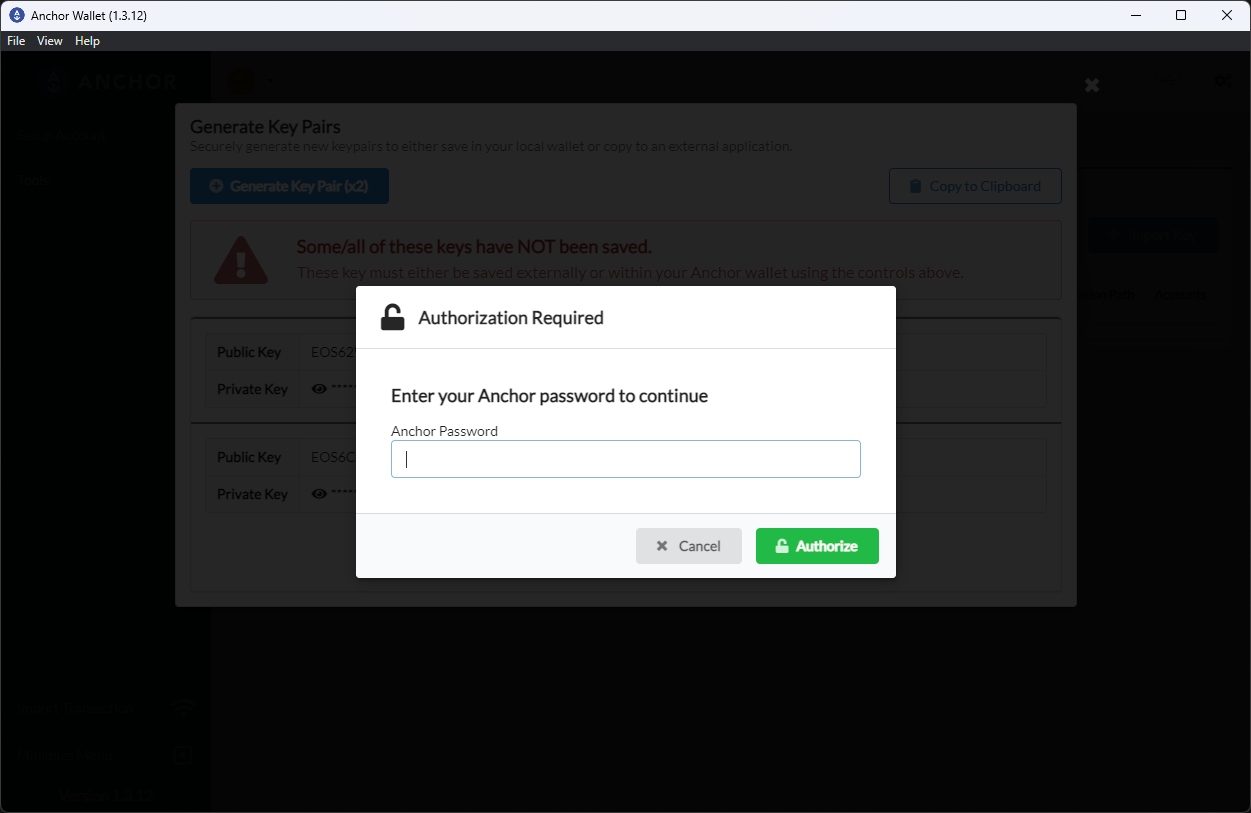
- Confirm that the keys were saved successfully.

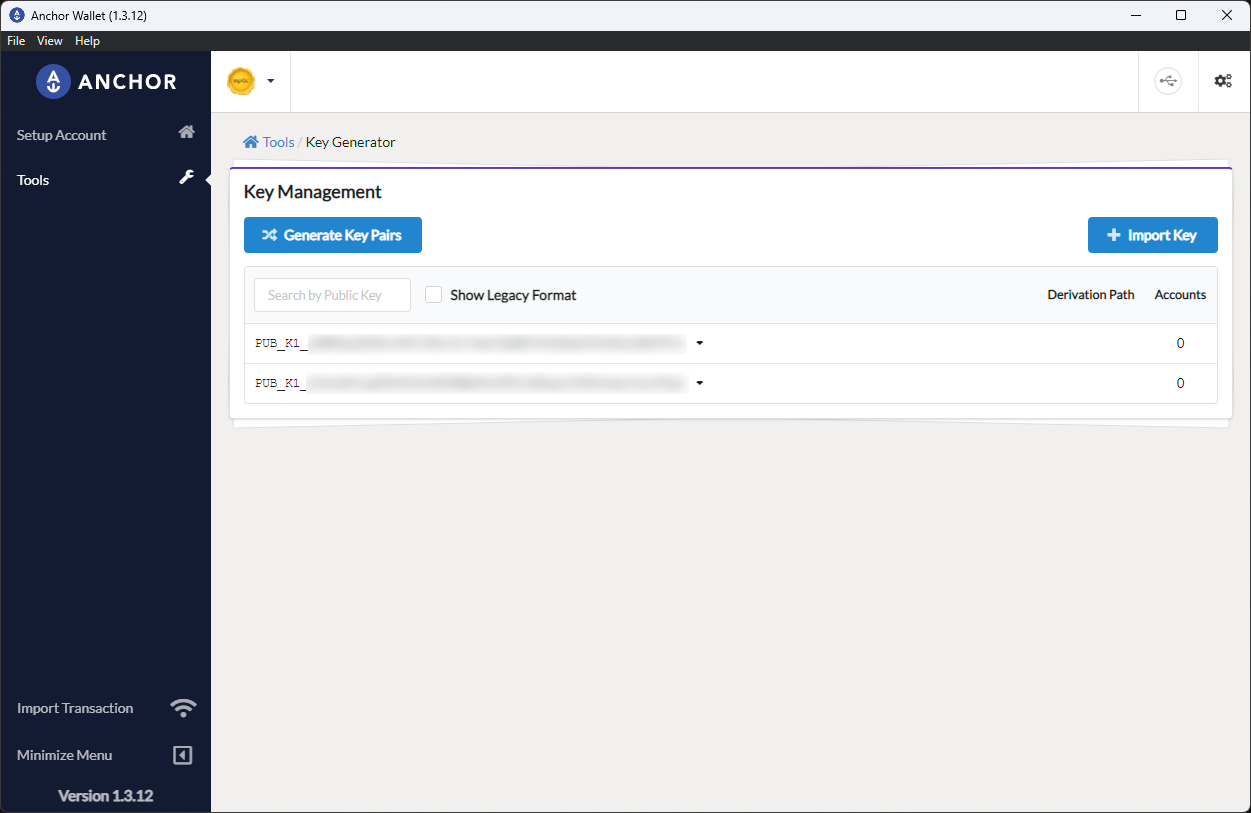
- Back in Key Management, confirm the public keys are listed. You can copy the keys from here to use in the claim form.
Secondary Option: Generate Keys with the WAX Explorer
If you do not want to generate the keys inside Anchor, you can use the official WAX explorer at waxblock.io.
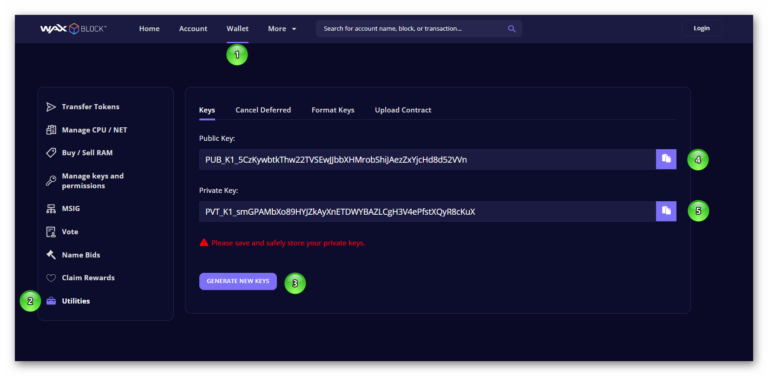
- Navigate to Wallet (1), then Utilities (2).
- Click Generate new keys (3).
- Copy the public key (4) and private key (5) for the first permission, Owner.
- Repeat the process to create another key pair for Active.
- Store all four keys safely and clearly label which pair belongs to Owner and which belongs to Active.
Claim Your Account from My Cloud Wallet
Once your keys are ready, proceed with the claim flow in My Cloud Wallet.
- Visit My Cloud Wallet and sign in.
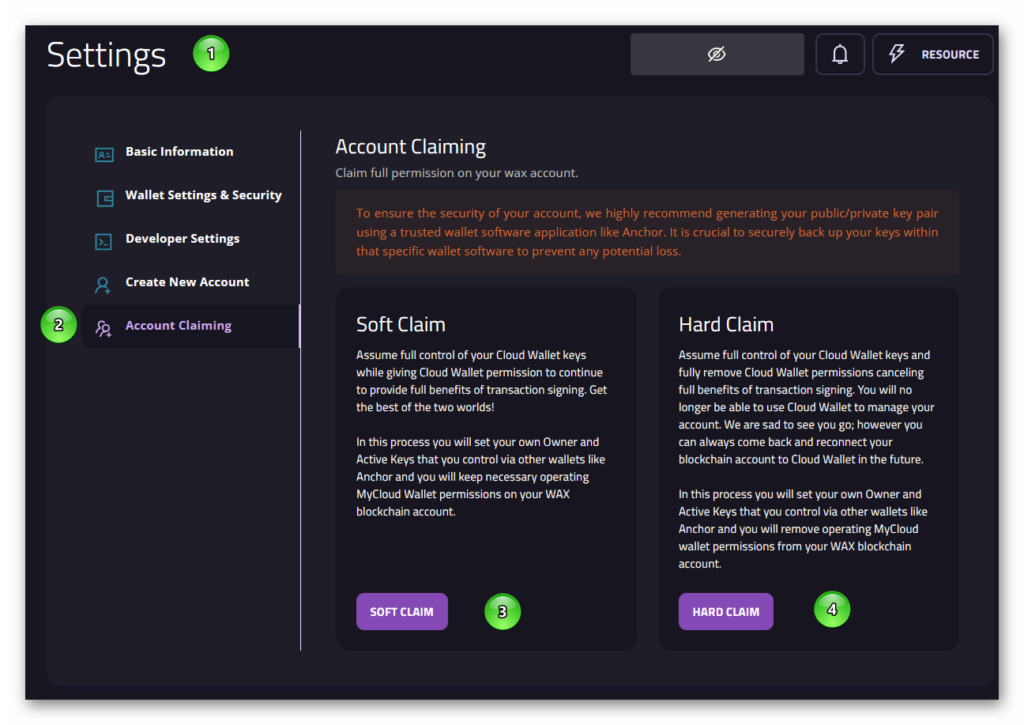
- Open Settings (1), then Account Claiming (2).
- Choose one of the two account claim options.
- Soft Claim (3): Keeps the account linked to My Cloud Wallet while adding your own keys.
- Hard Claim (4): Fully disconnects the account from My Cloud Wallet custody and moves control to your own keys. After this, you will need another wallet such as Anchor to use the account.
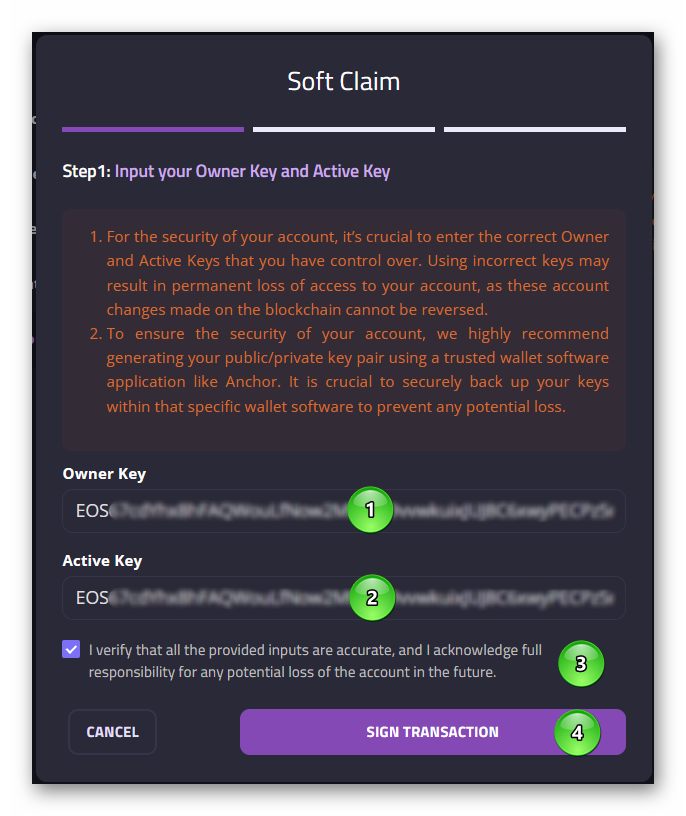
Soft Claim
- Enter the public keys for Owner (1) and Active (2). These should begin with
EOSorPUB_ - Carefully verify the keys before continuing.
- Select the compliance checkbox (3) and sign the transaction to begin the claim.
My Cloud Wallet then sends a security code by email.
- Enter the emailed numerical code (1).
- Click Next (2).
- Wait for the claim process to complete.
Hard Claim
Soft Claim keeps the My Cloud Wallet multisig model in place. That means you may still be able to log in with My Cloud Wallet, but external wallets will not have full standalone signing control.
Hard Claim removes the multisig setup and fully transfers control of the account to your own keys. After a Hard Claim, you will no longer use My Cloud Wallet as the controlling wallet for that account. You will need a third-party wallet such as Anchor.
The claim form itself is the same as Soft Claim. The difference is the option you choose and the final custody result.
Import the claimed Account into Anchor
After the claim completes, return to Anchor and import the claimed account using the keys already saved in the wallet.
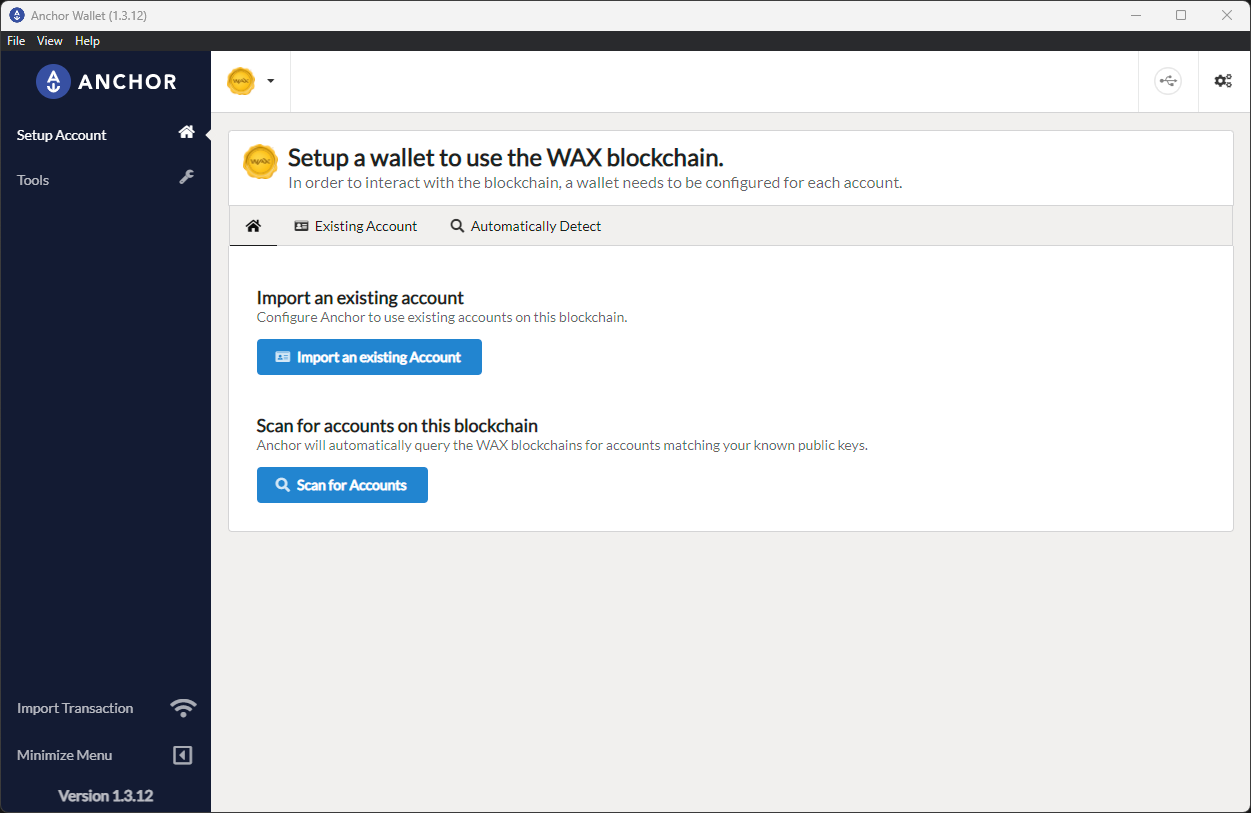
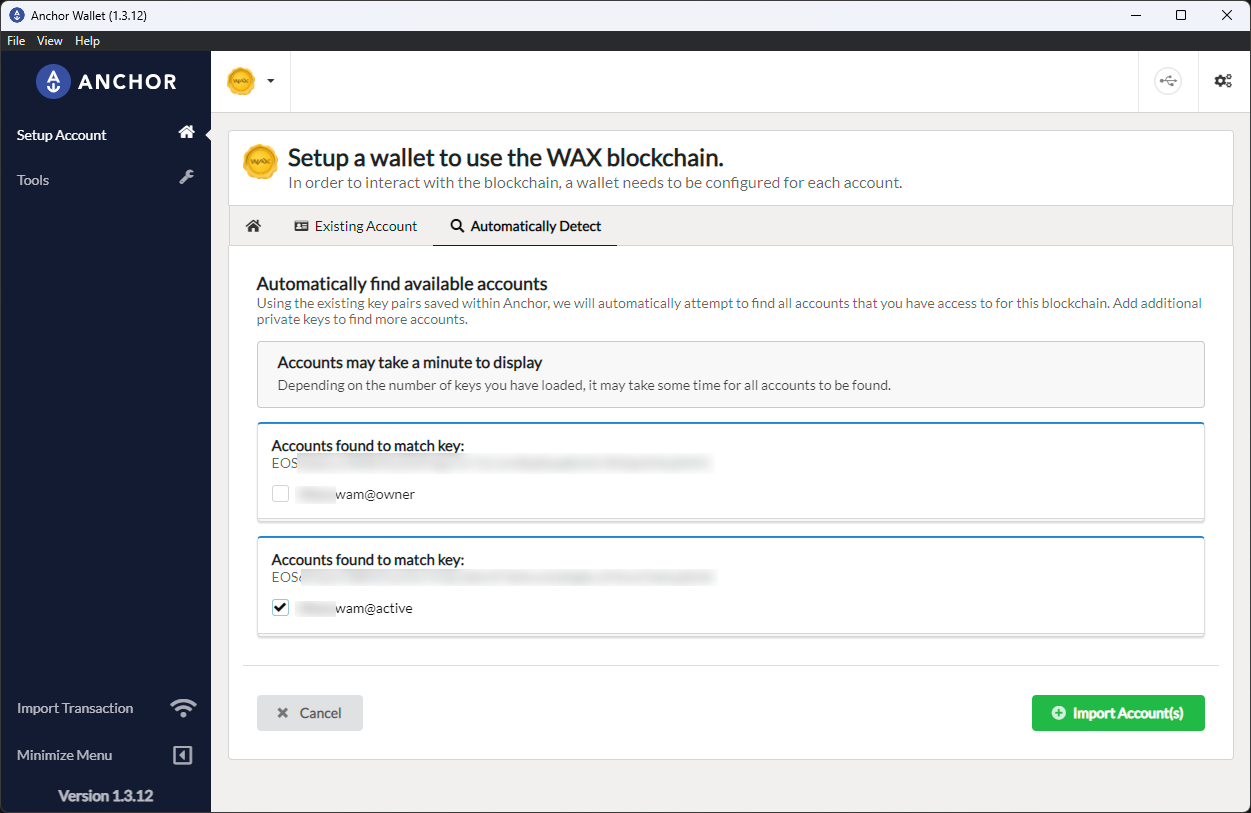
- Open the WAX account setup flow in Anchor. With advanced options enabled, Anchor shows an Automatically Detect tab next to Existing Account.

- Open Automatically Detect. Anchor scans WAX for accounts that match the keys stored in the wallet. Select the account permission you want to import, then choose Import Account(s).
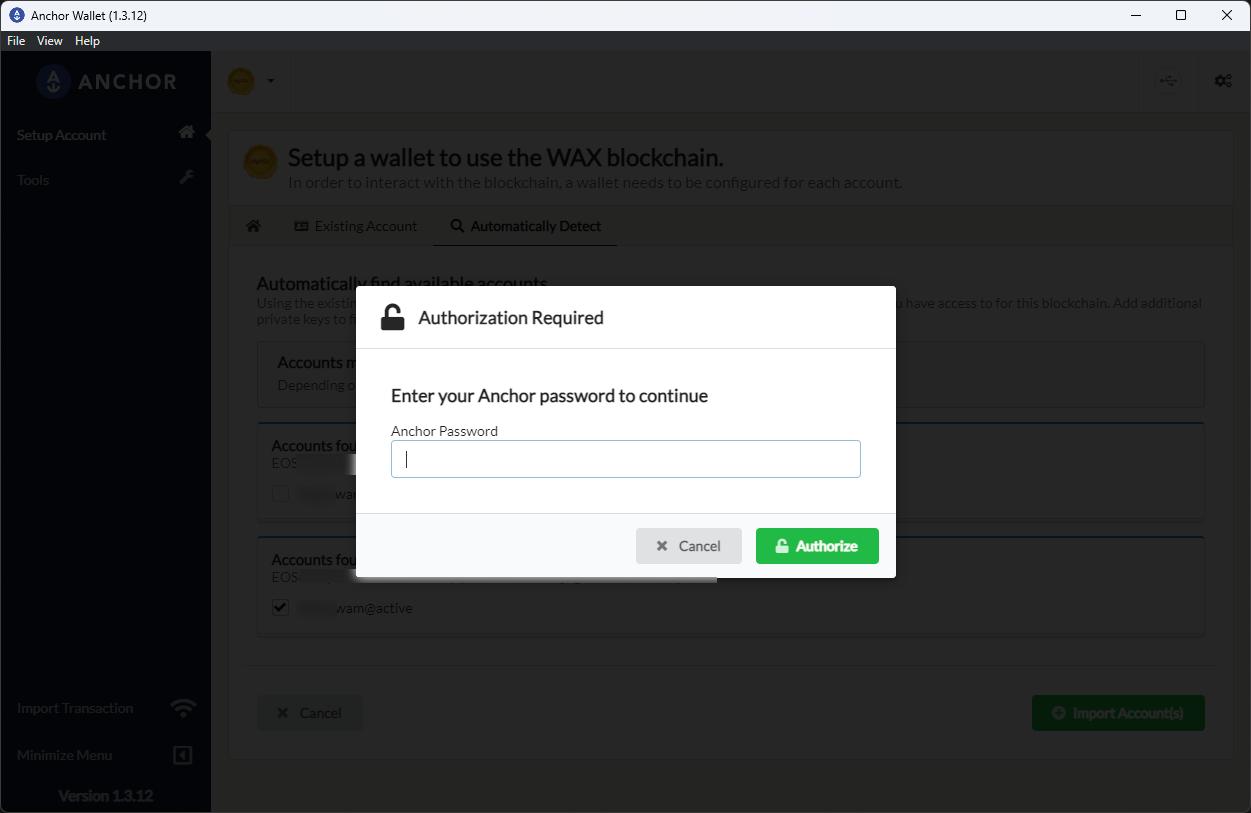
- Enter your Anchor password to authorize the import.
This is the cleanest Anchor flow when you generate the claim keys in Anchor first. If you created the keys elsewhere, you can still import them into Anchor manually from Tools > Manage Keys.
Notes
- Soft Claim keeps the My Cloud Wallet relationship in place, so some signing behavior still depends on the My Cloud Wallet multisig setup.
- Hard Claim fully transfers control to your own keys. Back up the Owner and Active private keys before finishing the claim.
- If you lose the private keys used for Hard Claim, My Cloud Wallet cannot recover the account for you.
- For more help using Anchor, see Anchor Wallet and Importing Accounts into Anchor Wallet.